 The Heartlandham Group
 My aunt Janice,my cousin and upline Amy,myself, and Mom.


 Sending Love Notes: 118778 Kisses $3.95/117226 small square envelopes $4.95
 Vinage Vogue Stamp Set
117690 wood stamp set $23.95/118598 clear stamp set $17.95
 The Heartlandham GroupMy aunt Janice,my cousin and upline Amy,myself, and Mom.Sending Love Notes: 118778 Kisses $3.95/117226 small square envelopes $4.95 Vinage Vogue Stamp Set
 When - Monday, April 26
 This is what we did at our last technique class with the GIRLWHOSTAMPS GROUP. I can't wait to finish what we started at our next class. It's always so much fun. If you are intrested in going let me know friends are always welcome.
 I was so thrilled to receive the news in the mail;
 Step 1: you need your 5-petal flower punch and punch out two flowers
 Step 2: Glue the petals together where they meet up with one another
 Step 3: Snip the bottom out of each flower.
 Step 4: take your yoyo yellow and dob the middle of one flower,
 Step 5: you will take your linen thread 2 4'' pieces. Twist and thread through.
 Step 6: Use your paper piercing tool to curl the petal edges a bit.
 My finished one in a bundle. The are so pretty and elegant. Love it!
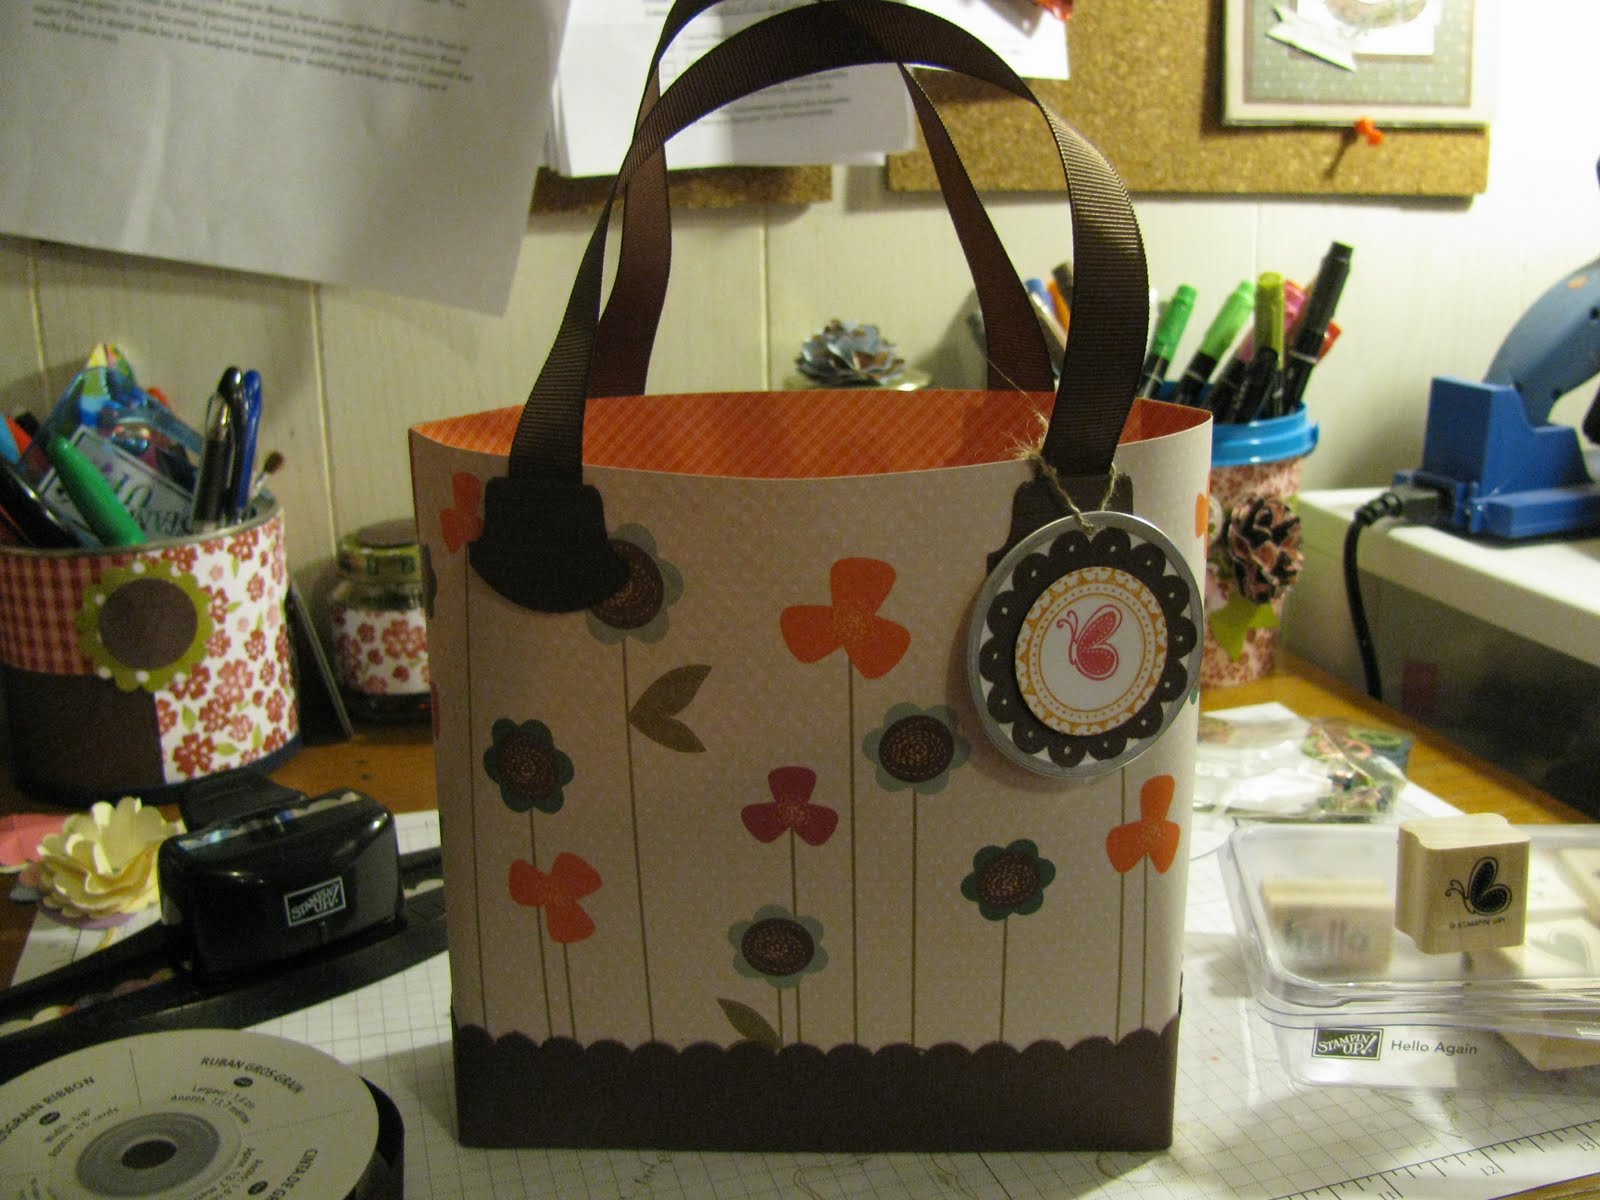 Step 10: Take your tab punch and punch out two tabs and cut in half. Attach your ribbon pieces to each tab with sticky strip and then add to purse again using sticky strip. I added a dangle charm to one of the handles to give that finale shebang. Now all you have to do is make a few greeting cards of your choice and you have the perfect gift.
 Step 7: Take two 1 1/2" x 8 1/2" strips of CS. Create a scalloped border using the scallop punch. Place sticky strip all along the bottom edge of the scalloped border.
 Step 6: This is what your purse should look like.
 Step 5: Place a small piece of sticky strip at the top, and then use your Tombow Multi-purpose adhesive and place a thin layer along the edge of the side "flap". Stand the box up and stick as shown in the picture above so that the two edges overlap by only about 1/4". Repeat on the other side.
 Step 4: When you stick the two pieces of DP together, you only want them to overlap about 1/4". This is VERY IMPORTANT if you want to be able to get the "purse" look, with the top of the bag being wider than the bottom of the bag. Now that you see how the sides should overlap, you need to add some adhesive to the inside of the side flap to stick them together. Shown below.
 Step 3: Take your 6" x 10" piece of DP and starting at one end, align the edge of the DP with the bottom edge of the box side and carefully, bring it around the front, and end at the other side. *Make sure you wrap the 9" side along the bottom of the box – the 6" side is the height* It will look like this:
 Step 2: Wrap sticky strip all the way around the bottom of your box base like shown below.
 Step 1: Take an 8" x 4" piece of card stock Score it at a 1'' on all four sides Attach the four sides so that it looks like the picture above.
 CARD STOCK/PAPER
During the month of April, you may purchase this lovely Awash with Flowers stamp set in either traditional wood mount or the new-to-SU! clear mount.
As a hostess for a $350 workshop during April, you will receive this lovely stamp set for FREE! (This must be presented as a workshop order by a SU! Demonstrator and isn't valid as an online order.)
Or, as a customer you can 'be the first on your block' to simply order the stamp set and place it in your collection. It will be available for this sneak peak purchase during April. And after April you'll have to wait for the new Idea Book & Catalog to be released on July 1, 2010.
Also available during April are these other two-step stamping sets---at 20% off.


